Discover the secrets to creating Angel lash extensions in this easy-to-follow guide! Elevate your client’s beauty with stunning fluttery extensions.
Have you ever wanted lashes that feel as light as air and as dreamy as an angel’s wings? That’s where Angel Lash Extensions come in! These extensions lengthen the eyelashes while creating a whimsical, ethereal look that feels straight out of a fairy tale. Let’s unlock the secrets to achieving that heavenly Angelic look effortlessly.
Contents
- 1 Introduction to Angel Lash Extensions
- 2 What Are The Differences Between Angel Lashes vs Classic Lash Extensions?
- 3 Factors to Consider Before Applying Angel Lash Extensions
- 4 The Angel Lash Extension Process
- 5 Creating Angle Lashes Mapping for Angel Extensions
- 6 Aftercare Tips for Angel Lash Extensions
Introduction to Angel Lash Extensions
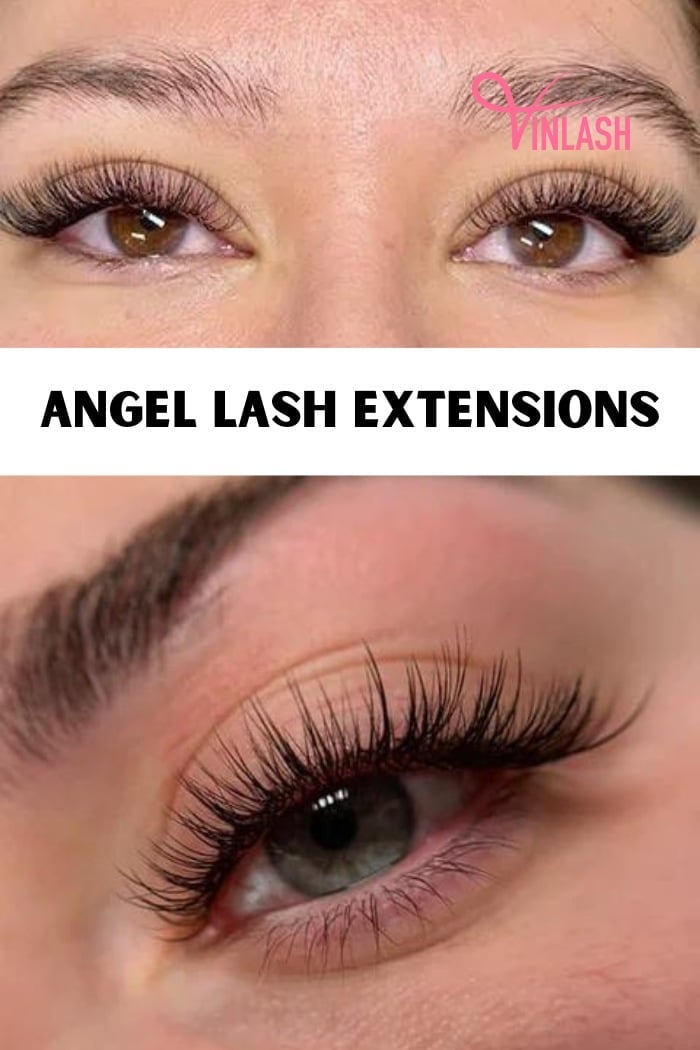
Before learning to apply Angel lash extensions, you should have a glance at these fluttery, ethereal lashes that make your eyes look like they belong to an angel.
Introduction to Angel Lash Extensions
Let’s find some interesting facts about Angel lash extension with us now:
- Definition: Angel lash extensions are a special kind of lash magic designed to give you that fluttery, soft, and oh-so-glamorous appearance. They involve a delicate mix of various lengths, curls, and textures to achieve that wispy, feathery effect around your eyes.
- History: Believe it or not, Angel lashes have been fluttering their way into the beauty scene for some time now. They’ve evolved from the classic lash extension technique to bring a touch of magic and fantasy to your lashes. As people began seeking a more ethereal and unique look, lash technicians worked their magic to create this distinct style.
So, get ready to add a touch of magic to your gaze with Angel eye lash extensions. That’s all about making your eyes shine brighter than ever before!
>> See more:
- Guide to features and mapping of squirrel eyelash extensions
- What are hybrid eyelash extensions and tips to master it
What Are The Differences Between Angel Lashes vs Classic Lash Extensions?
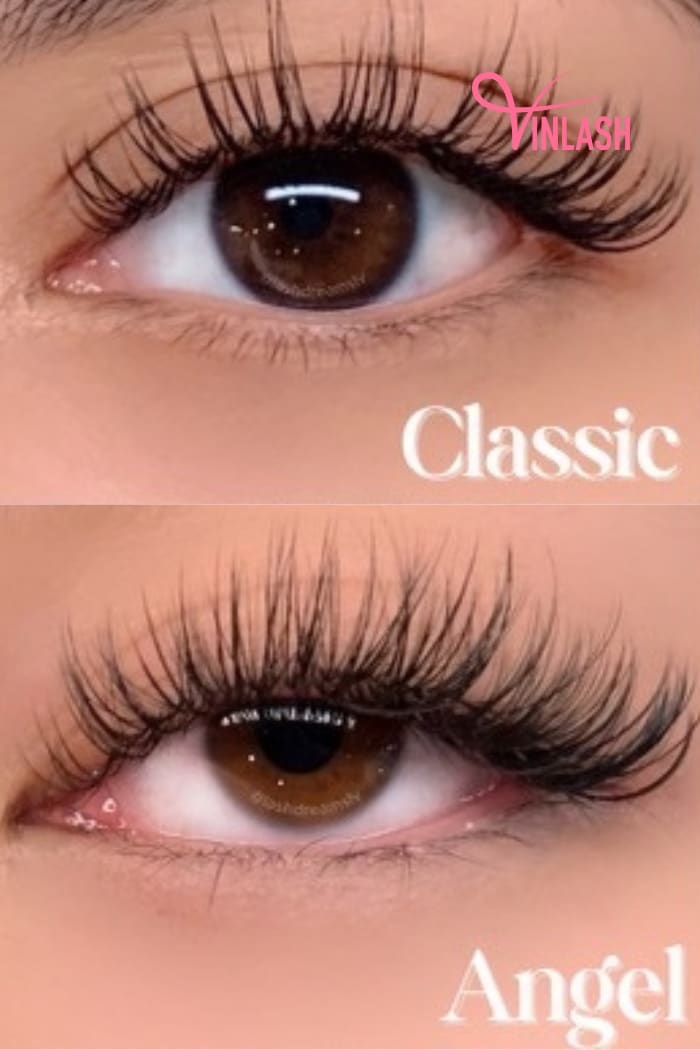
Now, let’s talk about what makes Angel eye lash extensions stand out when compared to Classic lash extensions:
What Are The Differences between Angel Lashes vs Classic Lash Extensions?
- Lash extension thickness: Classic lash extensions typically use thicker lash fibers ranging from 0.15mm to 0.20mm. These create a noticeable yet natural enhancement. Angel lash extensions, on the other hand, use ultra-thin 0.03mm lashes to create a wispy, weightless appearance.
- Weightless Feel: Due to the ultra-fine nature of the lashes used in Angel extensions, wearers often experience a lighter feel. It’s like wearing next to nothing, yet you get this stunning, fluttery effect that adds depth and allure to your eyes.
- Distinctive Wispy Appearance: The combination of using 0.03mm lashes and the specific application technique creates a distinct wispy appearance. This effect mimics the softness and delicate nature of angel wings, giving your eyes a dreamy, almost magical look.
So, imagine achieving that classic lash look but feeling like you’re barely wearing anything at all. That’s the beauty of Angel lash extensions – they take the classic effect and make it lighter than air, leaving you with stunning, customized lash extensions that feel as amazing as they look!
Factors to Consider Before Applying Angel Lash Extensions
Vinlash factory can help lash brands to know some friendly pointers to consider when thinking before the Angel lash extension application:
- Personal Style And Preference: Decide if your clients prefer a subtle, everyday look or a more bold and eye-catching style. Angel lashes offer a range, so choose what suits your vibe!
- Customization Options: Angel lash extensions offer various options in terms of length, curl, thickness, and style. Talk with your clients about their preferences to customize the look they desire, whether it’s a more dramatic or natural appearance.
- Eye Shape And Suitability: Different eye shapes complement various style differently. Understanding your clients’ eye shape helps in determining that Angel lash extension is the right style with lash maps for eye shapes that enhances their natural features.
- Eye Health And Sensitivity: Consider the eye health and any sensitivities your clients may have. Some individuals might be allergic to certain materials or adhesives used in lash extensions. It’s important to communicate any concerns with your clients beforehand.
By considering these factors, you can ensure a pleasant and satisfying eyelash experience for your clients. Remember, clear communication with your clients and proper aftercare is key to maintaining those stunning, ethereal lashes!
The Angel Lash Extension Process
Getting those Angel lash extensions involves three main stages: preparation, Angel lash mapping, and the actual application. Within each stage, there are several little steps that we’ll go through together.
Let’s keep scrolling down to uncover the details about each step!
Preparing For Angel Lash Extension Application
Preparing for Angel lash extensions involves several key steps to ensure a smooth and successful application process:
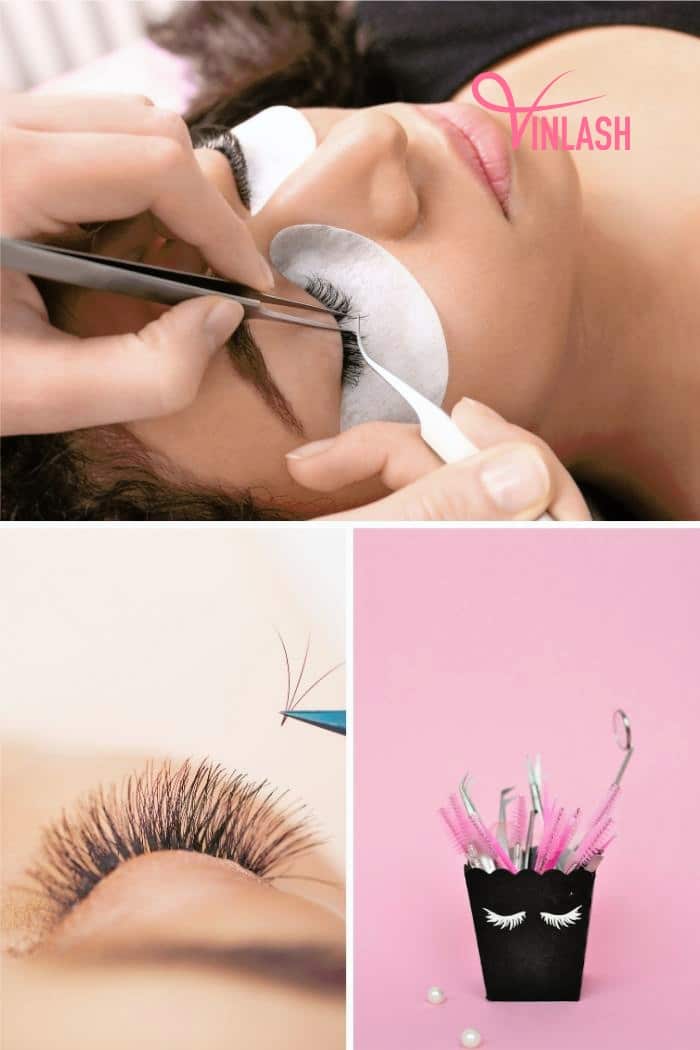
Preparing for Angel lash extension application
- Client Discussion: Have a friendly chat to comprehend what the client wants. Discuss their desired lash style, length, curl, and overall look they’re aiming for.
- Sanitization: Ensure your tools are clean and sanitized. Also, remember to tidy up your workspace to provide a calming atmosphere for your client.
- Gathering And Organizing Tools: Have precision tweezers, isolation tools, adhesive holders, and other necessary instruments ready for an accurate and efficient Angel lash set mapping process. Also, arrange your tools and equipment in an easily accessible manner for a smooth application process.
- Client Preparation: Gently cleanse the client’s natural lashes to remove any oils or residue. Use a lash primer to prep them for the extensions.
By following these preparation steps, you create a welcoming and professional environment while ensuring that both you and your client are ready for a successful angel lash extension application!
Creating Angle Lashes Mapping for Angel Extensions
There are two popular lash mapping techniques for Angel lash extensions – pre-made lash maps and custom lash maps. While pre-made maps are more convenient for the mass consumer world, custom lash maps provide a personal touch to your client’s lash lines. However, these maps require more skills and experience for implementation. This section will focus on custom lash mapping.
To form alluring spikes for the wispy 2D lash fans, you should choose lashes ranging from 0.05 to 0.07mm in diameter. Please check the detailed steps to apply appropriate lash’s lengths and curls for Angel lash extensions.
Step 1: Understand The Natural Lash’s Growth Rule:
Understanding the growth rule of natural human lashes will help lash techs determine the suitable lengths and curls for each lash. All the following steps (from Step 3 to Step 4) will follow this rule.
- Lash Sections: The longest, biggest lashes will be placed from the middle to the hooded area of the eyes. We call this area the “peak” of the lash line. Reversly, the shortest, smallest lashes will be in the inner and outer corners of the eyes. The lash’s lengths, volumes, and curls gradually decrease to two sides (the inner and outer corners) of the eyes.
- Lash Layers: An Angel lash set will be divided into three layers – top, middle, and bottom layer. The lashes will be curled only in the top and bottom layers.
By understanding the growth rule of human lashes, lash techs will be more confident to create a natural, wispy 2D look for your client’s Angel lashes.
Step 2: Divide The Lash Line Into At Least Four Sections:
The purpose of the lash division is to make your lash map become equal and neat. While most lash techs choose to divide the lash line into four sections, you can continue breaking the lash line to create more spikes or add more customizations to Angel lashes.
- Vertically split the lash line into two equal sections – section (A) is from the eye’s middle to outer corner, and section B is from the eye’s middle to inner corner.
- Continue splitting section (A) into two child sections – section (A1) is from the middle to the eye’s hooded point, and section (A2) is from the hooded point to the outer corner.
- Split section B into two to three child sections, depending on your client’s desired lash look.
While dividing the client’s lash line takes time, it adds extra precision to the final Angel lash set for your clients. This extra preparation step helps you resume the process more quickly with fewer mistakes if your clients have to stop the lash application process suddenly for personal reasons.
Step 3: Choosing Appropriate Lash Lengths And Curls For Each Layer
Remember to create uneven lashes of various lengths in the top and middle layers to create a natural, wispy texture for the Angel lashes. For the lash curl, you should use light curls (C or D curl) while doing Angel lash set mapping. The curl level should gradually increase from the inner to the outer corner of the eye. These curls offer an open, fluttery result to your client’s lash lines compared to dramatic L curls.
More specifically:
- For The Top Layer: the lash’s length should be from 10 to 14mm and follow the natural human lash growth rule, depending on your client’s desired look. The lash curl choice for this layer from the inner to outer corner is 7-8-9-10-11CC, in which 9CC is the curl of the eye’s middle point. This curl arrangement offers a wet look to your client’s Angel lash extensions.
- For The Middle Layer: Choose lashes with an even length of 9mm. No lash curls for this layer.
- For The Bottom Layer: Choose lashes with a length of 8mm for this layer. The lash curl arrangement for this layer from the inner to outer corner is 6-7-8-9-10 CC, in which 8CC is the curl of the eye’s middle point. This curl arrangement adds a wispy 2D effect for the bottom lash fans.
By following these steps and keeping an open, active discussion with your client, you can create an appropriate Angel lash set mapping to handle a stunning set of angle lash extensions.
A Step-by-step Guide For Applying Angel Lash Extensions
The process of applying Angel lashes involves a few key steps to achieve that dreamy, fluttery look.
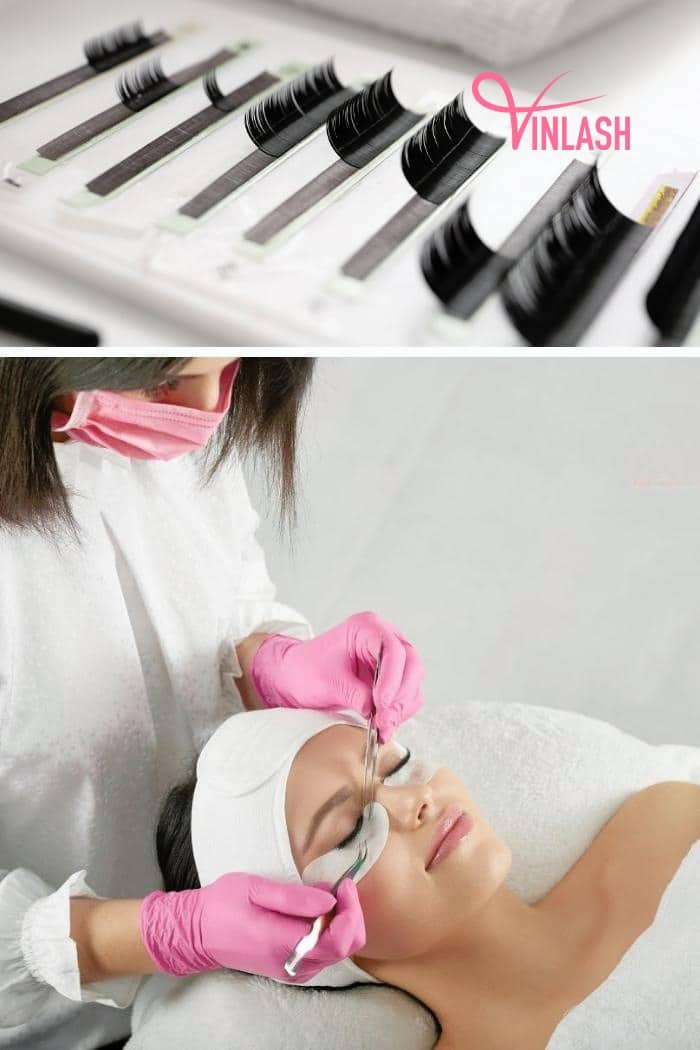
A Step-by-step guide for applying Angel lash extensions
Here’s an overview:
- Isolating Natural Lashes: Using special tweezers, isolate each natural lash to work on them individually.
- Adhesive Application: Apply a small amount of adhesive to an extension and place it carefully on the isolated lash.
- Creating The Angelic Effect: Mix and match lengths and eyelash extension styles to create that soft, layered effect – just what you love about Angel lash extensions. It’s like painting a beautiful, fluttery picture with lashes!
- Ensuring Comfort: Place extensions at a safe distance from the lash line to avoid irritation and allow natural lash movement.
- Allow Adhesive To Cure: Give the adhesive a bit of time to set and bond properly.
- Quality Check: Once all extensions are in place, check for symmetry, comfort, and angelic flutteriness!
That’s the journey! From understanding the client’s wishes to crafting those beautiful Angel lashes, each step is about creating a delightful experience and stunning results.
Aftercare Tips for Angel Lash Extensions
Congratulations on those stunning new Angel lash extensions! Now, to keep these fluttery beauties looking fabulous, a little care goes a long way.
Aftercare isn’t just about preserving their charm; it’s about keeping your clients’ eyes mesmerizing.

Aftercare Tips for Angel Lash Extensions
So, here are some super easy and friendly aftercare tips your clients will love. These tips will keep their lashes looking incredible without any fuss!
- Gentle Cleansing: Use a lash cleanser or gentle makeup remover to clean the lashes daily. Gently brush through them with a clean spoolie to remove any debris or makeup residue.
- Pat Dry, Don’t Rub: After cleansing, pat the lashes dry with a soft towel. Avoid rubbing or pulling on them, as this can cause damage or premature shedding of the extensions.
- Be Cautious With Water And Heat: Avoid exposing your lashes to excessive heat or steam, as it can weaken the adhesive. Be cautious while swimming or in high-humidity environments.
- Avoid Oil-based Products: Oil can weaken the lash adhesive and make the lashes fall earlier. So, avoid using oil-based makeup or skincare products around the eye area. Opt for oil-free alternatives to keep your lashes looking their best.
- Avoid Mascara With Extensions: Skip mascara on your extensions. Most mascaras contain ingredients that can harm the extensions or make them clump together.
- Regular Touch-ups: Schedule touch-up appointments every 2-3 weeks to maintain the fullness and beauty of the Angel lash extensions. This helps replace any extensions that have shed naturally.
By following these simple aftercare tips, your clients can keep the Angel eye lash extensions looking fluttery, beautiful, and captivating for longer, ensuring that dreamy, angelic gaze lasts!
In conclusion, bringing that angelic flutter to your clients’ lashes can be such a fun and rewarding experience! Don’t hesitate to recommend Angel lash extensions to your clients seeking that magical and ethereal look. It’s a fantastic way to enhance their natural beauty and leave them feeling like they’ve got wings! Remember, with a bit of creativity, care, and the right techniques as well as proper Angel lash set mapping, you’ll be turning ordinary lashes into fluttery, dreamy works of art for your clients. Enjoy the journey and the magic of Angel eye lash extensions!

