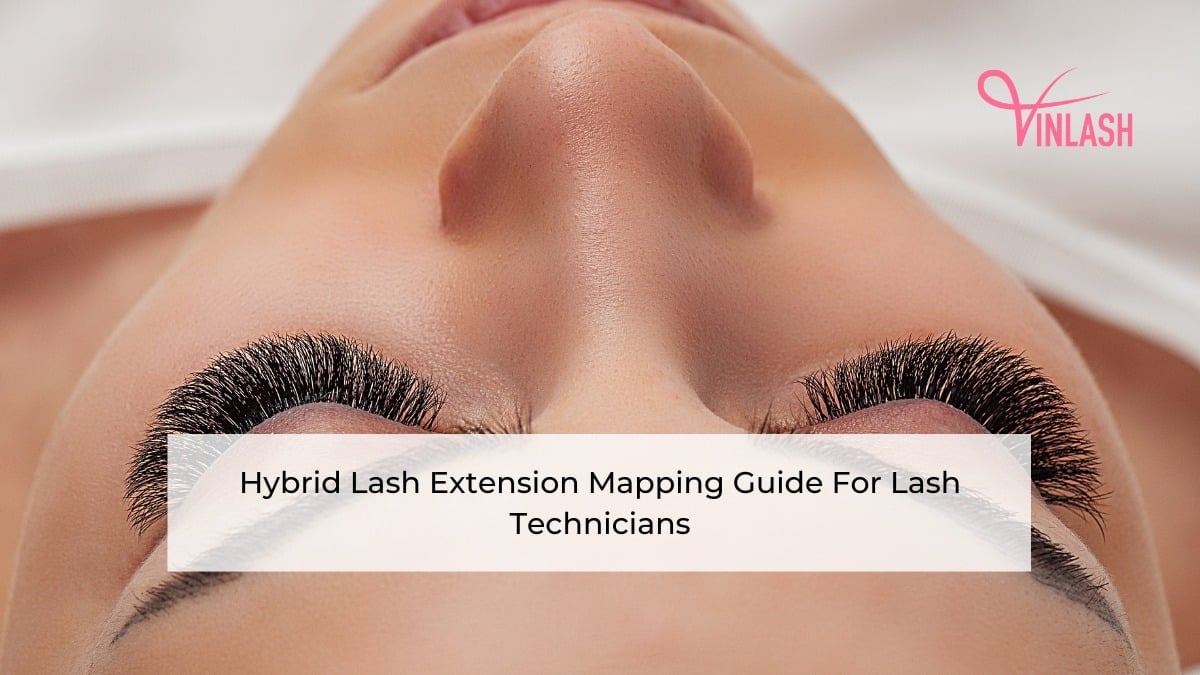
Master lash mapping fundamentals with our comprehensive guide for lash technicians. Elevate your skills and create stunning lash designs effortlessly.
Welcome to the ultimate guide on lash mapping fundamentals tailored specifically for aspiring and seasoned lash technicians alike. In the realm of beauty enhancement, mastering the art is paramount. Whether you’re new to the craft or looking to refine your techniques, this comprehensive resource will equip you with the knowledge and skills needed to create stunning lash designs that accentuate the natural beauty of your clients’ eyes. Let’s delve into the intricate world of lash mapping and unlock the secrets to achieving flawless lash extensions every time.
Contents
Important factors to consider before you start lash mapping
Before you begin the lash mapping process, there are several crucial factors to consider. They include popular lash mapping styles, characteristics of your clients’ eyes, lashes, faces, lifestyles as well as tools and accessories you might need during the process.
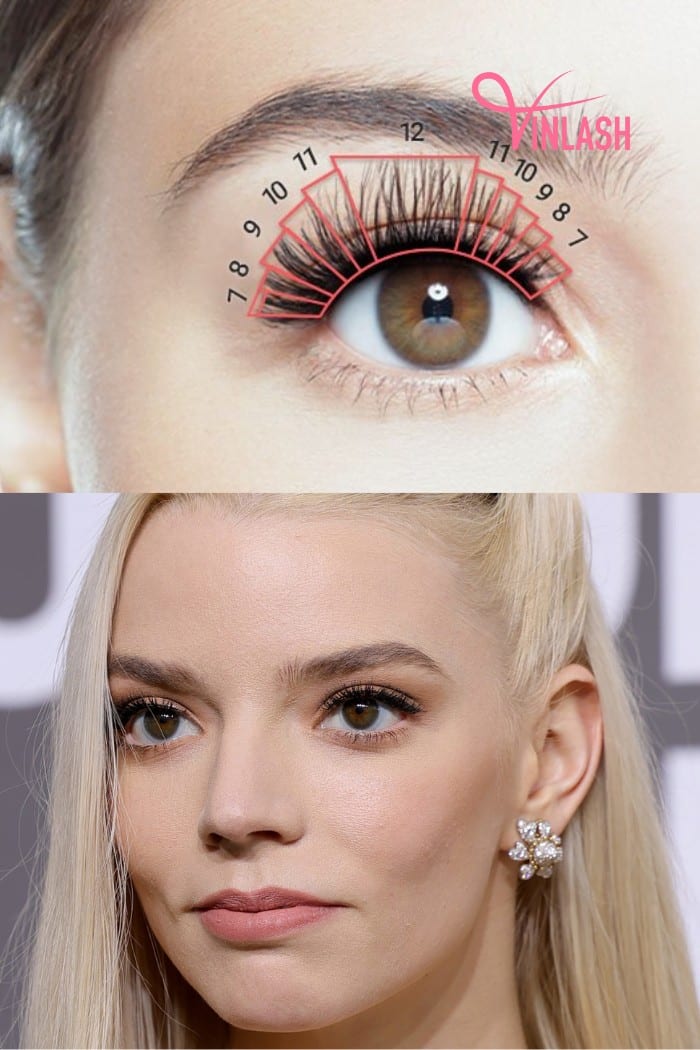
Popular lash mapping styles you should be aware of
There are several popular lash mapping styles that lash technicians should be aware of. These styles help create different lash looks and cater to various client preferences. Here are some popular lash mapping styles:
- Natural Lash Mapping: This style aims to enhance the client’s natural lashes while adding subtle length and volume. Eyelash extensions are applied in a way that mimics the natural lash growth pattern, creating a soft and effortless look. The lengths and curls used are typically similar to the client’s natural lashes, resulting in a natural enhancement.
- Cat Eye Lash Mapping: This style focuses on creating a winged or cat eyelash extensions, lifting and elongating the outer corners of the eyes. Longer lash extensions are concentrated towards the outer corners, creating a visually lifted and dramatic appearance. The lash map follows a tapering effect, gradually increasing in length towards the outer corners.
- Doll Eye Lash Mapping: The doll eye style aims to achieve a wide-eyed, innocent, and doll-like look. Lash extensions are evenly distributed across the lash line, emphasizing the center and inner corners of the eyes. The lash map focuses on creating symmetry and balance, with lashes of similar lengths and curls throughout the lash line.
- Open Eye Lash Mapping: This style is designed to make the eyes appear more open and awake. The lash map emphasizes length and volume in the center of the lash line, gradually tapering towards the inner and outer corners. Longer lash extensions in the center create the illusion of wider eyes, while shorter extensions towards the corners maintain a natural look.
- Hybrid Lash Mapping: Hybrid lash mapping combines the techniques of classic and volume lashes. Classic lashes are applied individually for a natural look, while volume fans are strategically placed to add density and fullness. The lash map incorporates a mix of classic and volume lashes, creating a textured and voluminous lash appearance.
- Kim Kardashian Lash Mapping: Inspired by Kim Kardashian’s signature lash style, this mapping focuses on achieving long, glamorous lashes. Lash extensions are concentrated towards the center and outer corners, creating a fluttery and sultry look. The lash map typically follows a cat-eye shape, with longer lengths and dramatic curls towards the outer corners.
Popular lash mapping styles you should be aware of
It’s important for lash technicians to have a good understanding of these popular lash mapping styles, as they can cater to a wide range of client preferences and help create customized lash looks. By mastering these styles, technicians can offer versatile options to their clients and achieve the desired lash effects.
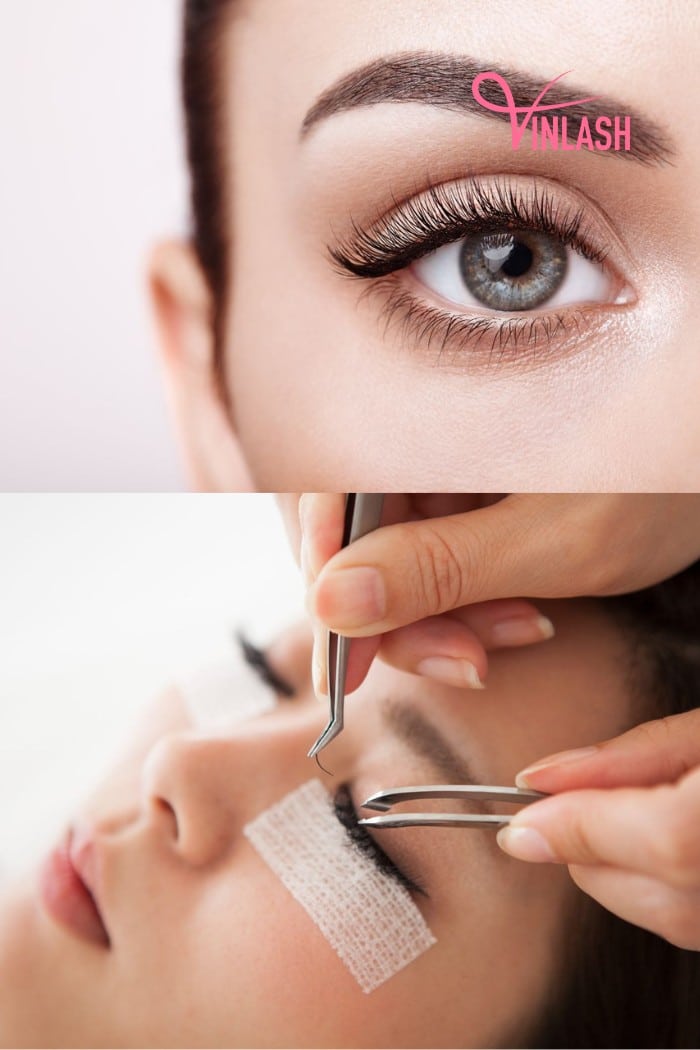
Factors to make the right choice for customers
Understanding clients’ faces, eyes, and lashes is important for lash technicians. It helps choose the right lash styles that make them look their best. Here’s how it works:
- Face Shape: Look at the client’s face shape, like oval, round, square, heart, or diamond. Pick lash styles that match. For example, cat-eye lashes can make round or square faces look longer, while doll eye lashes can soften sharp features.
- Eye Shape: Check out their eye shape, such as almond, round, hooded, monolid, or deep-set. Choose lash mapping for eye shapes that flatter their eyes. For example, cat-eye lashes can lift almond-shaped eyes, while doll eye lashes can make small eyes look bigger.
- Lash Characteristics: See how their natural lashes are – long, thick, or curly. Adjust lash styles to match. For instance, if they have long lashes, go for a natural look. If their lashes are thin, try a fuller style.
- Desired Look and Lifestyle: Talk to the client about what they want and how they live. Recommend styles that fit. For example, someone who wants a simple look might like a natural style, while someone who wants drama might go for cat-eye or Kim Kardashian style.
Factors to make the right choice for customers
By carefully analyzing these factors, lash technicians can tailor lash styles to suit each client’s unique features and preferences. This personalized approach ensures that the selected lash mapping style complements the client’s face shape, enhances their eye shape, works with their natural lash characteristics, and aligns with their desired look and lifestyle.
Necessary supplies you might need for lash mapping
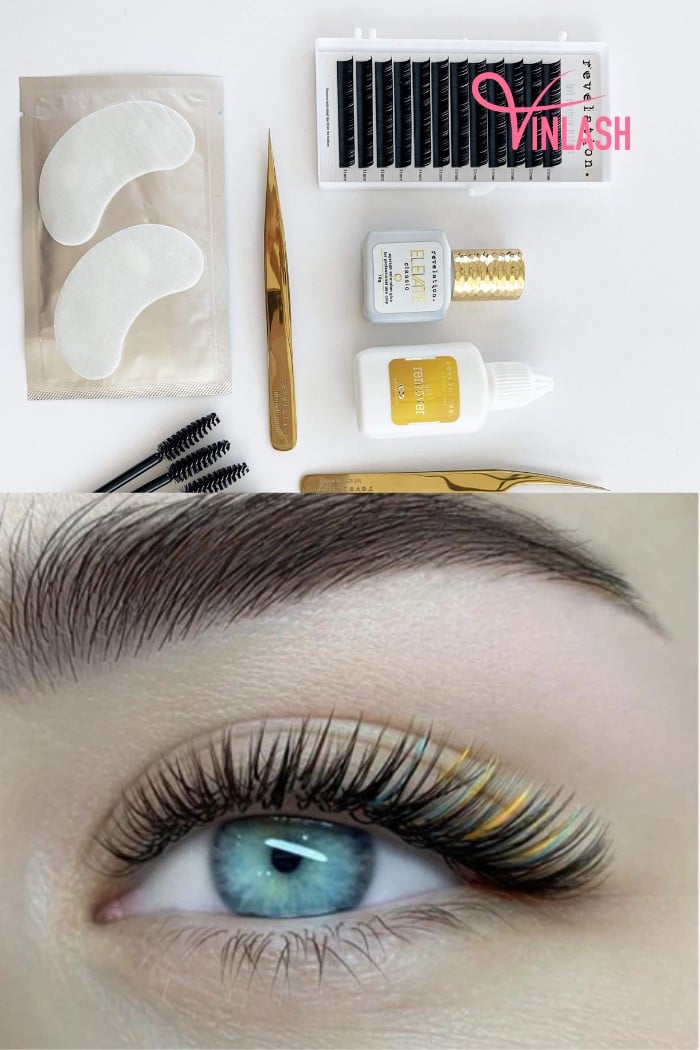
When it comes to lash mapping, there are a few essential supplies that lash technicians may need to ensure a smooth and precise mapping process. Here are some necessary supplies for lash mapping:
- Lash Mapping Stickers or Adhesive Dots: Lash mapping stickers or adhesive dots are used to mark the boundaries and divisions of the lash line into zones. These stickers or dots help create a visual guide for the lash technician during the application process.
- Tweezers: Precision tweezers are a must-have tool for lash technicians. They are used to holding and manipulating lash mapping stickers, adhesive dots, or lash extensions during the mapping process.
- Lash Mapping Pen or Pencil: A mapping pen or pencil can be used to draw guidelines or markings directly on the client’s skin or a lash mapping pad. This helps create precise and visible lash maps that guide the lash technician during the application.
- Lash Mapping Pad or Paper: A lash mapping pad or a piece of paper serves as a surface for drawing and planning the lash map. It allows the lash technician to visualize the lash lengths, curls, and directions for each zone.
- Lash Cleanser and Primer: Before beginning the lash mapping process, it is essential to cleanse the client’s lashes thoroughly to remove any oils, dirt, or residue. Lash cleanser and primer help ensure a clean and optimal surface for the lash extension application. It is recommended that you get these liquids from reliable lash suppliers as they are important pre-treatment products that affect the lash extension results.
Necessary supplies you might need for lash mapping
Having these necessary supplies on hand ensures that lash technicians have the tools they need to accurately map the lashes and create a precise and customized lash extension application.
A step-by-step guide to perfect lash mapping
Vinlash Vietnam can recommend you about achieving a flawless lash mapping and lash extension application requires careful planning and precision. The process of lash mapping typically involves consultation & analysis, client preparation, lash diameters selection, lash zone division and marking, and lash extension application.
Prepare the clients for the lash mapping process
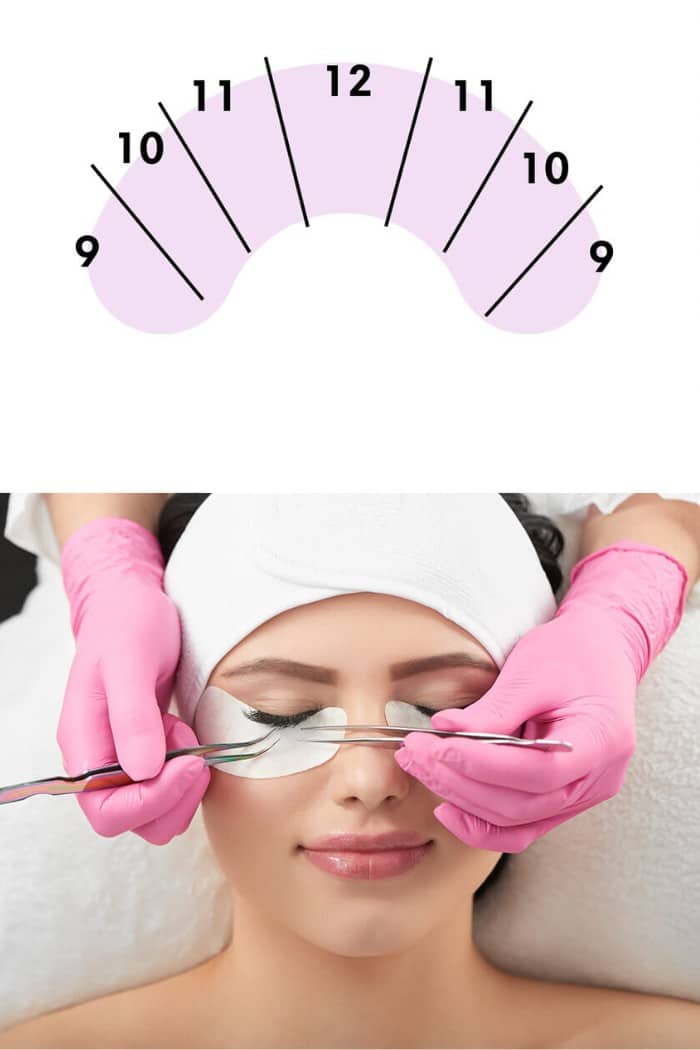
Preparing the clients for lash mapping is an important step to ensure a smooth and successful session. Here are the steps to prepare the clients for the lash mapping process:
Prepare the clients for the lash mapping process
- Remove Eye Makeup: Instruct the client to remove any eye makeup, including mascara, eyeliner, and eyeshadow, before the lash mapping process. Ensure the eye area is clean and free of any residual makeup or oils.
- Cleanse the Lashes: Cleanse the client’s lashes using a lash cleanser and primer to remove any residual oils, dirt, or debris. Use lint-free applicators or brushes to gently clean the lashes from the roots to the tips.
- Protect the Lower Lashes: Place under-eye pads or gel patches on the client’s lower lashes to isolate them and protect them during the lash mapping process. Ensure the pads are positioned comfortably and do not obstruct the client’s vision.
- Positioning and Comfort: Ensure the client is positioned comfortably on the lash bed or reclining chair. Provide a supportive neck pillow or bolster to maintain their comfort throughout the process.
- Communicate and Address Concerns: Encourage open communication with the client and address any questions or concerns they may have regarding the lash mapping process. Reassure them of your expertise and experience in creating a lash design that suits their preferences and enhances their natural beauty.
By following these steps, lash technicians can ensure that clients are well-informed, comfortable, and prepared for the lash mapping process. This helps in establishing trust and setting the stage for a successful lash extension application.
Select lash lengths, thicknesses and curls
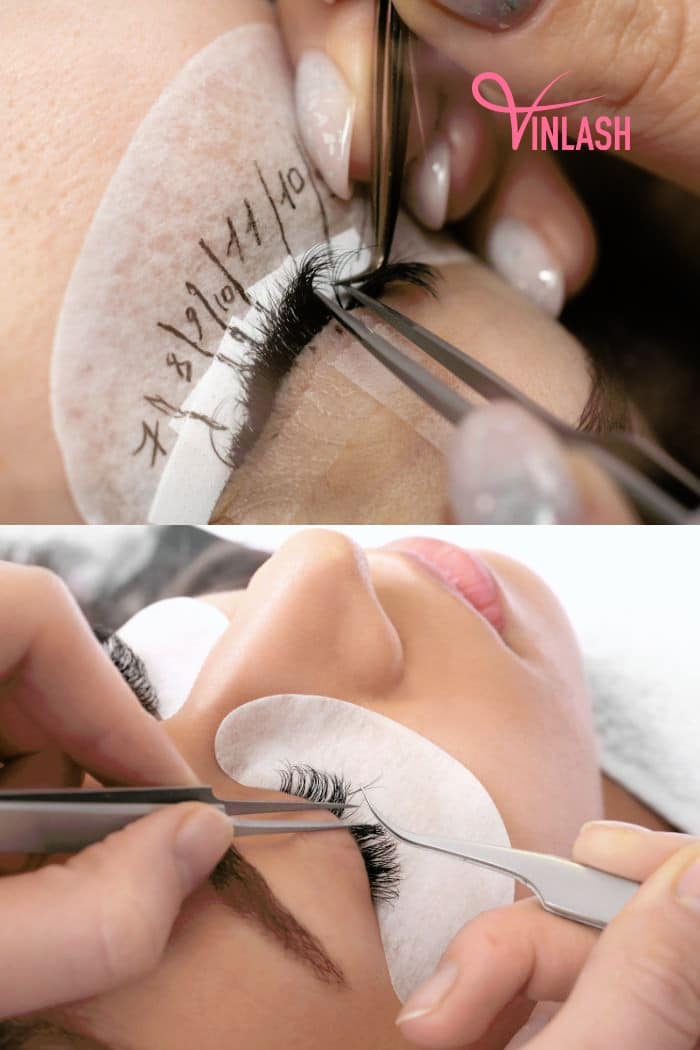
Selecting the appropriate lash lengths, thicknesses, and curls is indeed an essential step in the lash mapping process. These factors significantly impact the final outcome of the lash extensions and play a crucial role in achieving the desired lash look for the client. Here are some key considerations during the selection process:
- Make Lashes Look Natural: Start with shorter lashes on the inside and make them longer towards the outside. This makes a smooth transition between natural and fake lashes.
- Pick the Right Thickness: Choose how thick the lashes should be based on what the client wants and their own lashes. There are different options like 0.05mm, 0.07mm, 0.10mm, etc. Make sure they don’t look too heavy or fake.
- Choose the Right Curl: Use a curl that matches the client’s natural one or the one they want when do lash mapping. You can pick from a natural curl (J-curl) to a more curled one (C-curl or D-curl). Think about what they want and what fits their natural lashes.
- Mix Things Up: Create a design with different lengths, thicknesses, and curls to make the lashes look fuller and more interesting. Changing things up adds depth and makes the lashes look more alive.
- Keep Things Even: Make sure both eyes look the same by keeping the lengths, thicknesses, and curls consistent. Step back every so often to check and make sure everything looks good together.
Select lash lengths, thicknesses and curls
By carefully selecting lash lengths, thicknesses, and curls, lash technicians can create a lash mapping design that enhances the client’s natural beauty, suits their eye shape, and achieves the desired lash style.
Divide lash zones and mark the lash line
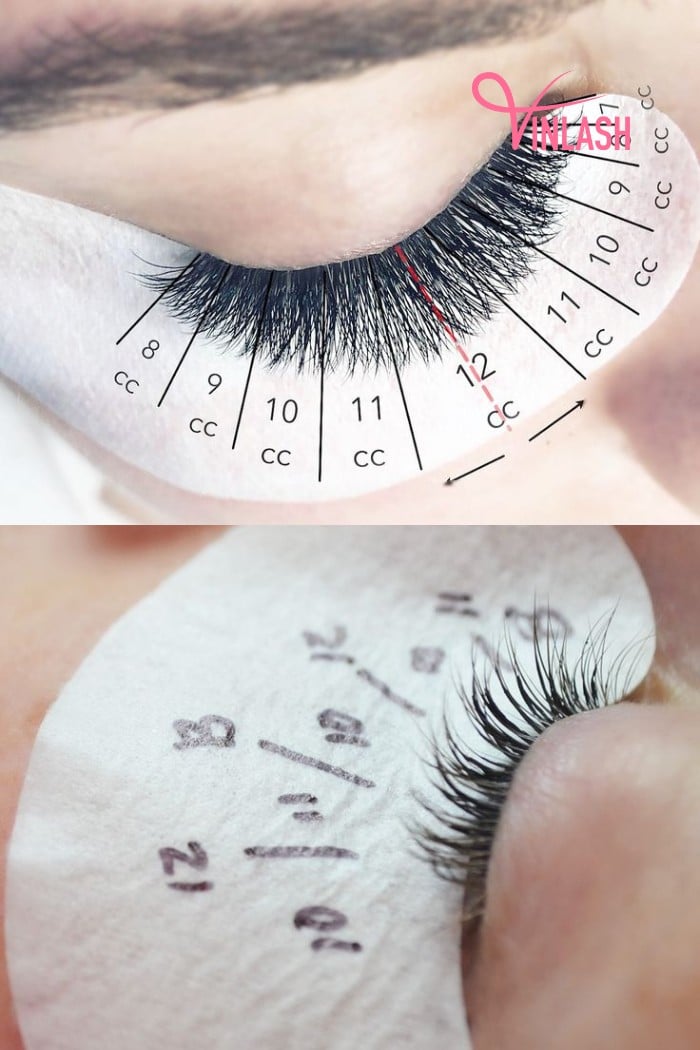
In the lash mapping process, dividing the lash line into zones and marking it are crucial steps. These techniques help guide where to put lash extensions and make sure the design looks balanced. Here’s how you do it:
- Split the Lash Line: Look at the client’s eye shape and natural lashes. Find the inner, center, and outer parts of the lash line. Split it into these zones so you know where to put each lash.
- Use Mapping Tools: Grab tools like lash mapping stickers, adhesive dots, or a lash mapping pen. They make it easy to mark the lash line accurately every time.
- Mark It Out: Start by cleaning the client’s natural lashes well. Stick a mapping sticker or dot close to the lash line to show where each zone starts and ends. You can also draw lines with a mapping pen on a pad or paper.
- Keep It Even: Step back often as you mark to check if both eyes look the same. Make sure the lengths and curls match up for a neat, even look. Adjust as needed to get it just right.
Divide lash zones and mark the lash line
Dividing the lash line into zones and marking the lash line provides a visual roadmap for applying lash extensions. It helps maintain consistency, balance, and symmetry, resulting in a beautifully tailored lash look. Remember to consider the client’s features, desired style, and maintain clear communication to ensure a satisfying outcome.
Start lash extension application process after lash mapping
When you’re putting on lash extensions, it’s important to use the lash map as a guide. This map shows you where to put the lashes and what size, thickness, and curl to use. Here’s how you do it:
- Start in the Right Area: Begin where you marked on the lash map. For instance, if you marked the inner corner as Zone 1, focus there first.
- Choose the Right Lash: Pick a lash that matches the lash sizes, thickness, and curl for that zone. This helps it blend in with the natural lashes.
- Put on the Extension: Use tweezers to carefully grab the lash near the base. Dip it in a bit of lash glue and place it on a natural lash in the zone. Make sure it’s about 1-2 mm away from the eyelid.
- Repeat: Keep adding lashes to the rest of the natural lashes in that zone, following the same steps when lash mapping. Keep everything consistent with the lash map.
- Move to the Next Zone: Once you finish a zone, go to the next one on the lash map. Put lashes there following the same rules.
- Keep It Balanced: Step back every now and then to make sure both eyes look even. Adjust as needed to keep things symmetrical.
- Finish Up: Keep going until you’ve covered the whole lash line. Stick to the lengths, curls, and thicknesses on the lash map.
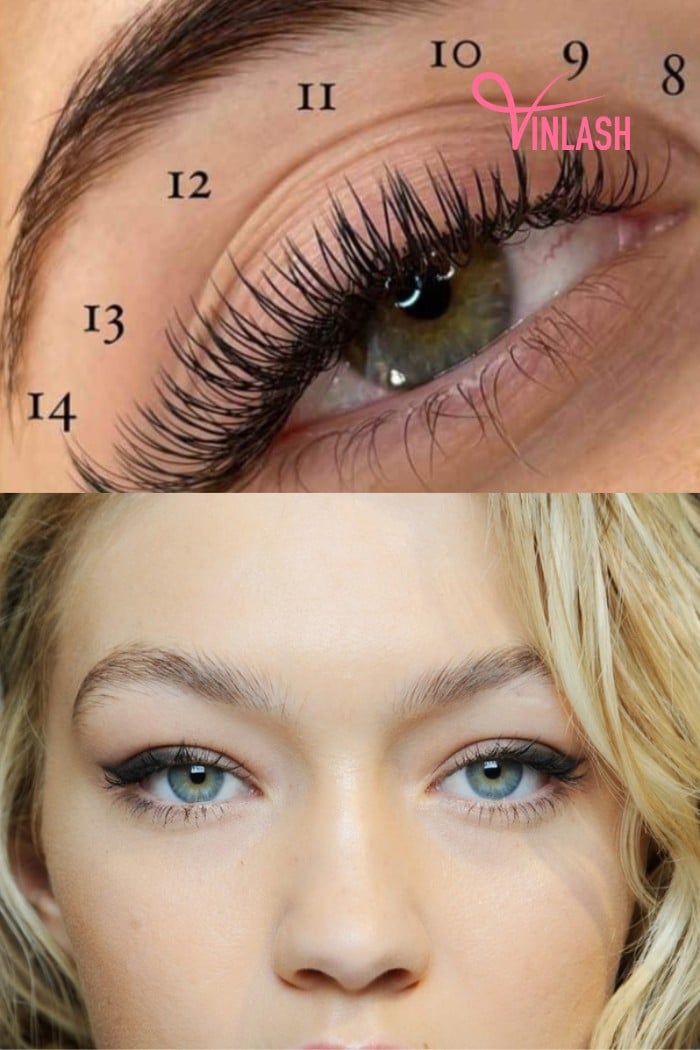
Start lash extension application process after lash mapping
By using the lash map, you make sure each lash goes where it should be. This gives you a nice, planned look that matches what your client wants. Check your progress against the lash map regularly to stay on track and get the look just right.
Conclusion
By continuing to experiment and refine your techniques, you’ll steadily enhance your skills as a lash technician. Remember, every set of lashes you work on is an opportunity to learn and grow. Stay committed to your craft, and before you know it, you’ll be dazzling clients with your expertise and artistry. Keep striving for excellence, and enjoy the journey of mastering lash mapping fundamentals.

